
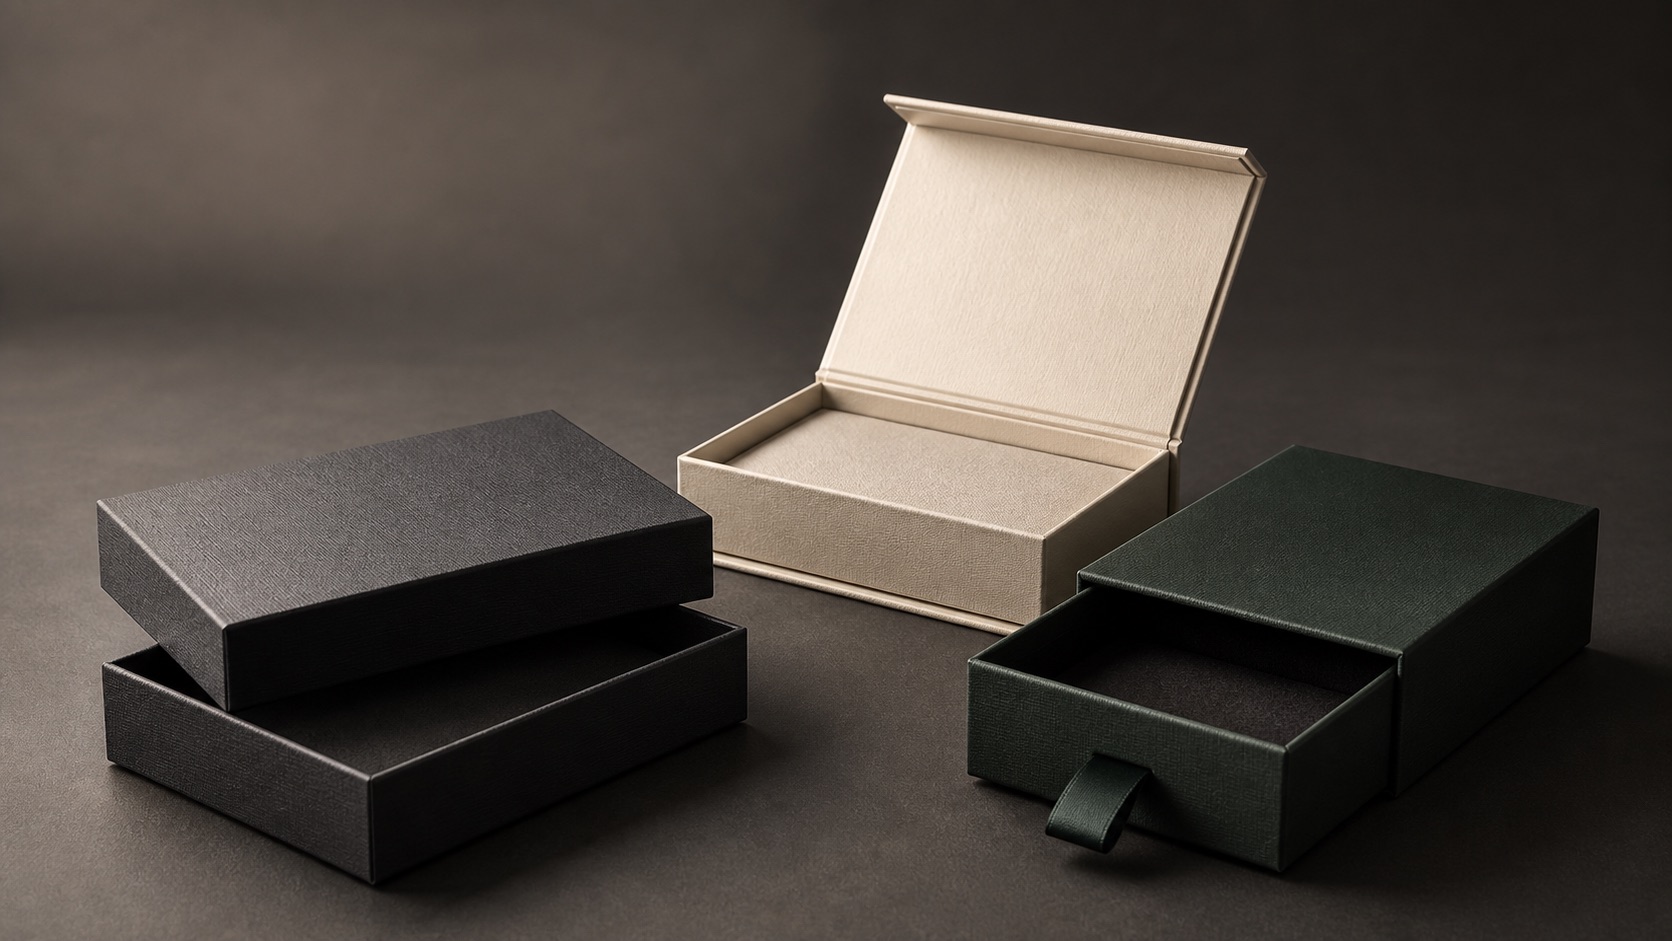
Custom Rigid Boxes for Luxury Products: A Buyer’s Guide
A detailed sourcing guide for luxury rigid boxes, including structures, materials, finishes, inserts, quality controls and quote requirements.
Quick answer: Custom rigid boxes for luxury products use thick paperboard wrapped with printed or specialty paper to create a permanent, premium structure. They are appropriate when presentation, tactile quality and reuse value justify higher unit cost, assembly labor and freight volume. Success depends on structure, wrapped-corner quality, closure, insert fit and an approved production-representative sample.
Looking for a production quote? Review our custom rigid boxes capabilities, then send the product dimensions, quantity, destination and artwork status through the quotation form.
A rigid box is often the first physical proof of a luxury promise. Customers notice lid resistance, corner sharpness, wrap texture, color consistency and how the product sits before they inspect a technical specification. Buyers therefore need to convert subjective words—“premium,” “tight,” “soft touch”—into measurable materials, tolerances and approval criteria.
What makes a rigid box different?
A traditional rigid or set-up box is built from thick greyboard or another dense board that is cut, grooved or assembled into a three-dimensional shell. A thinner decorative wrap is glued around it. Unlike folding cartons, most rigid boxes do not ship flat. This gives them strong form and a substantial feel, but it also increases storage and freight volume.
Rigid boxes are common for fragrance, skincare sets, jewelry, consumer electronics, spirits, gifts and limited editions. They are not automatically the best premium option. A well-designed folding carton or corrugated mailer may deliver better economics and adequate presentation. Use our rigid box versus folding carton comparison to decide at the format level first.
Choose a structure that matches the reveal
| Rigid-box style | Experience | Specification risk |
|---|---|---|
| Lid and base | Classic slow reveal; broad branding surfaces | Lid fit, air resistance and reveal depth |
| Magnetic book style | Hinged presentation and audible closure | Magnet position, hinge durability, material declarations |
| Drawer box | Controlled pull-out reveal | Sleeve friction, ribbon strength, stop design |
| Shoulder or neck box | Visible internal collar and precise alignment | Multiple components and tight registration |
| Clamshell | Integrated hinge and tray | Opening angle, hinge wear and wrap cracking |
| Collapsible rigid box | Reduced freight volume | Corner tape, magnets and assembly consistency |
Start with the desired opening sequence and the real product. A tall lid may trap air; a drawer may need a thumb notch; a heavy bottle needs an insert that supports its base; a magnetic flap needs enough board area and a safe closing path. Sketch the customer interaction and the fulfillment interaction separately. A beautiful reveal that is slow or confusing to pack creates recurring labor cost.
Greyboard, wrap and edge details
Ask for greyboard thickness and density, not only a generic “rigid board” description. The correct build depends on box size, unsupported span and product weight. Very thick board can add cost and make small details bulky; underbuilt board can bow. For color consistency, confirm whether the exposed internal edges are grey, white, black or covered.
Wrap options include printed coated paper, dyed-through specialty paper, textured paper, kraft paper and fabric-like papers. The wrap changes color, tactile feel, scuff resistance and corner behavior. Dark solid wraps can show glue marks, dust or edge rub. Pale uncoated papers may mark during assembly. Strong texture can reduce fine foil or print definition. Request a material swatch and a completed corner sample before selecting from a screen image.
Define how corners will look. On a wrapped lid, paper overlaps are usually managed at specific edges. Ask where seams fall and inspect them on the physical sample. Tight radii, deep boxes and complex shoulders require experienced handwork or specialized equipment. The approved sample should show the acceptable seam, corner, edge and glue standard—not only the front panel.
Design the insert as part of the luxury experience
The insert controls product position, protection and reveal. Folded paperboard can be printed and often keeps the pack predominantly fiber-based. Molded pulp provides a shaped fiber cavity and a distinctive material story. EVA or other foams create precise, cushioned recesses but introduce a different material and end-of-life pathway. Fabric-covered platforms add softness and cost. A multi-part set may need finger notches, ribbon lifts or accessory wells.
Fit-test the highest and lowest product dimensions. Bottles, jars and handmade items can vary more than CAD files suggest. A cavity that is too tight slows packing and can damage labels; one that is loose makes the product rattle. Confirm product orientation, removal force and whether the insert conceals essential information or accessories. For fragile products, the rigid presentation box may still need a corrugated outer shipper.
Printing and finishing without over-design
Printed wraps support photographic or complex graphics. Specialty papers often work best with controlled foil, screen print or blind embossing. Foil adds metallic or pigmented contrast. Embossing adds raised relief; debossing presses inward. Spot UV adds selective gloss but relies on accurate registration and a compatible surface. Edge printing, ribbon, metal hardware and custom closures should be treated as separate components with their own approvals.
Place special effects away from tight wrapped edges, hinges and seams unless the supplier confirms feasibility. Large solid foil areas can behave differently from fine lines. Deep embossing can telegraph through a wrap or weaken detail. A soft-touch film can create a premium hand feel but may show scuffs or affect recycling claims. The most convincing luxury box usually has a clear focal hierarchy, not every finish on every surface.
Tolerances that should be agreed
- Overall internal and external dimensions.
- Lid-to-base or drawer-to-sleeve fit and opening force.
- Board and wrap material references.
- Wrap seam and corner appearance.
- Print-to-edge and foil/emboss registration.
- Magnet polarity and closure alignment, if used.
- Insert cavity dimensions and product removal force.
- Color tolerance and approved viewing standard.
- Glue marks, scratches, dents, dust and edge rub limits.
Not every criterion needs a complex laboratory number, but each should have an approved reference and inspection method. Photograph the signed sample from all sides and assign it a version. If changes follow, issue a new version rather than approving through scattered email comments.
Sample in stages
- White or plain structure: validate dimensions, opening, insert and product fit.
- Material mock-up: confirm greyboard, wrap texture, seams and component feel.
- Printed/finished prototype: review graphics, foil, emboss, ribbon and closure placement.
- Pre-production sample: when risk justifies it, approve a sample made with production processes and materials.
- Golden sample: sign and retain the controlling reference for mass inspection.
Screen renderings are useful for alignment but cannot prove friction, wrap feel, foil reflection or insert fit. Budget the sample stage into the launch plan. Skipping it transfers a correctable prototype problem into an expensive assembled inventory problem.
Understand landed cost, not just unit price
Rigid boxes use more material and assembly than folding cartons. Because they normally ship assembled, freight volume can be a major share of landed cost. Collapsible designs may reduce cube, but they introduce corner construction and setup work. Compare options using units per master carton, cartons per pallet, cubic volume, gross weight, assembly at destination, defect allowance and freight term.
Quantity, number of sizes, number of colorways, wrap, insert, ribbon, magnets and finishes all affect pricing. Ask whether quoted tooling, samples, export packing and delivery are included. Our custom packaging cost guide explains how to normalize offers.
Rigid-box RFQ checklist
- Product dimensions, weight, value and fragility.
- Box style and target internal dimensions.
- Order quantity per size and artwork.
- Greyboard thickness or performance target.
- Wrap material, print colors and finish references.
- Insert material and product cavity requirements.
- Ribbon, magnet, hardware or accessory details.
- Sample stages and color approval method.
- Defect criteria, inspection level and golden sample.
- Destination, deadline, packing and freight term.
Frequently asked questions
Are custom rigid boxes suitable for direct parcel shipping?
They are presentation boxes, not automatically parcel shippers. Protect them with a fitted corrugated mailer or shipping carton unless the complete packed system has been validated for the route.
Do magnetic boxes cost more?
Usually, because magnets, placement, wrapping and assembly add components and operations. They also require correct polarity and closure testing.
Can rigid boxes ship flat?
Traditional set-up boxes do not. Collapsible rigid formats can reduce volume, but the corner construction and destination assembly must be approved.
What is the most important sample check?
Product fit and opening behavior come first. A color-perfect box that does not hold, release or protect the product is not production-ready.
Turn the luxury concept into a controlled specification
Packaging For produces lid-and-base, magnetic, drawer and other custom rigid boxes with engineered inserts and premium finishes. Share the real product, desired opening sequence, quantity, target market and delivery date through our custom packaging quote form. Our team can propose a structure and sample path before you commit to mass production.