
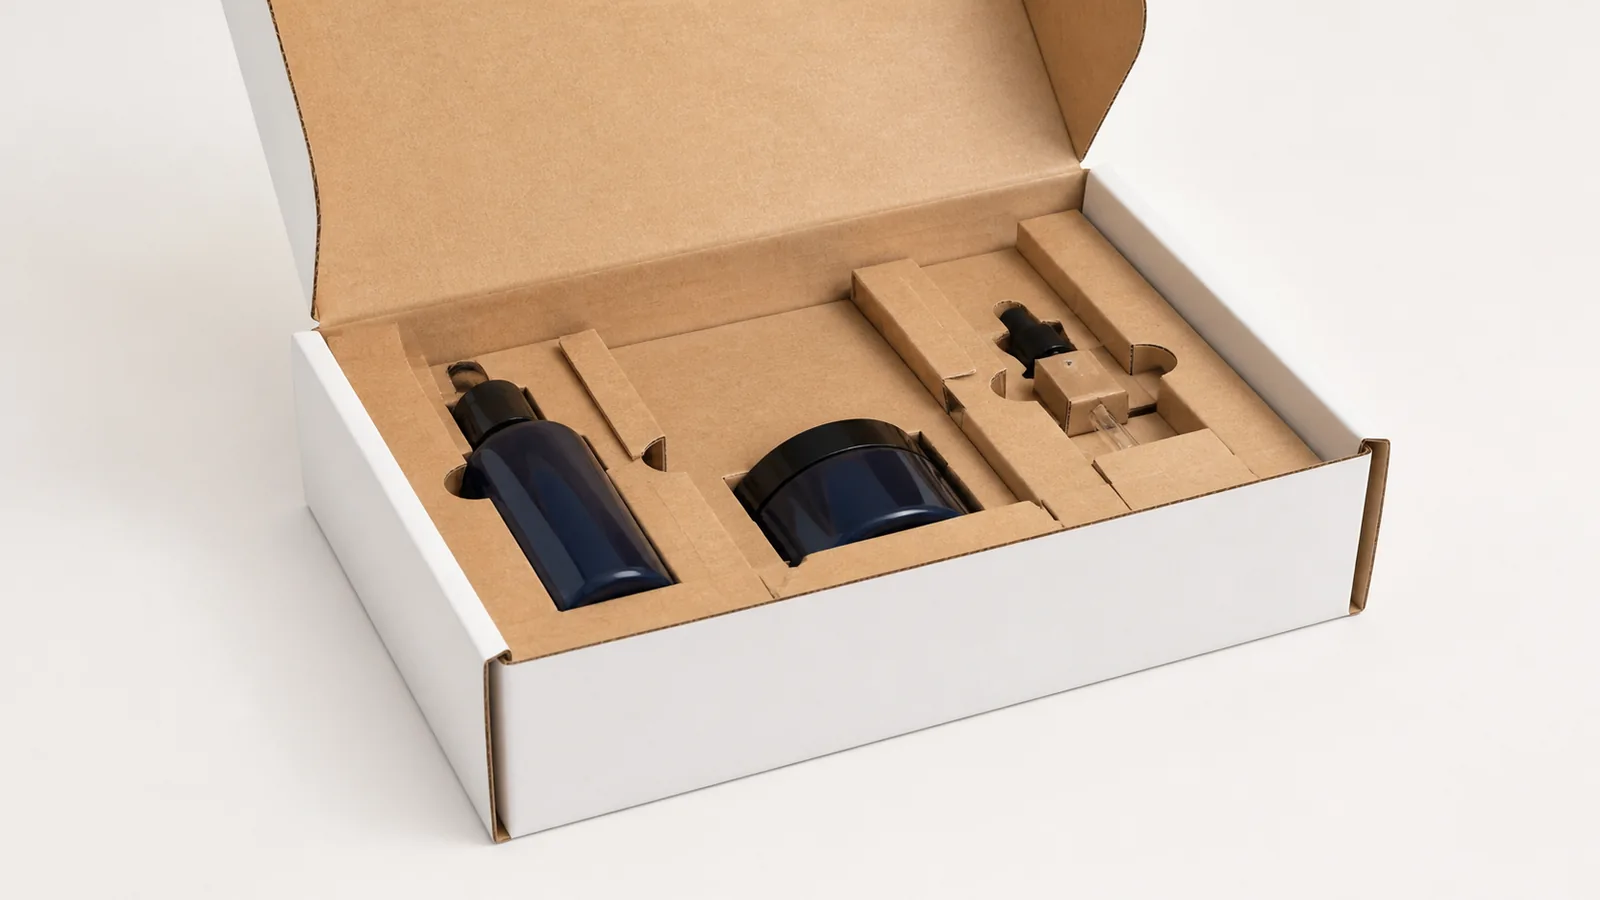
Mailer Box Insert Design: Fit, Retention and Testing
Mailer box insert design requires product tolerances, retention, removal access, pack-out trials and transit testing—not a perfect CAD cavity.
A CAD cavity can match a product perfectly on screen and still fail on the packing line. The bottle may arrive slightly wider than the approved sample. A label edge may catch on a tab. The product may stay in place during an upright display check, then lift out of the insert when the parcel turns onto its side.
Good mailer box insert design deals with that variation deliberately. It defines which movement must be stopped, where the product can safely be contacted and how a packer or customer removes it. Material selection comes later. The engineering discussion below stays with cavity geometry, retention and validation; PackagingFor’s insert-material comparison covers paperboard, corrugated, molded pulp and foam as separate material choices.
Begin with a restraint brief
“Hold the product securely” is too vague for a structural designer. The brief should name the movement or failure that matters. A glass bottle may need protection from side impact and vertical lift. A pump needs clearance so it cannot be actuated. A coated device may need contact kept away from its display surface.
For each component, record:
- finished dimensions and normal production tolerances;
- filled or operating weight, not only empty sample weight;
- preferred orientation;
- surfaces that may be contacted;
- surfaces that must remain visible or untouched;
- fragile features such as caps, controls, corners or labels;
- acceptable movement after handling;
- the intended removal point.
The priorities often conflict. More contact can improve retention but increase scuffing. A deep cavity can hide the product and slow removal. The design review should make those trade-offs visible instead of treating the tightest fit as the best fit.
Measure the production condition, not the catalog drawing
Catalog dimensions often omit a cap, folded cable, over-label or protective sleeve. They may also describe a nominal part rather than the largest normal production condition. Measure multiple production-equivalent samples when the component has meaningful variation.
Filled containers matter. Liquid weight changes the load on the base, and a fitted closure may sit differently after filling. If the product will arrive in a retail carton, measure that finished carton rather than the bare item. Accessories, instructions and product-contact wraps also belong in the packed envelope.
A useful dimensional record includes the measurement date, sample revision and who supplied it. When the bottle, pump or label changes later, the team can see whether the approved insert still applies.
Control movement in three directions
An insert should be checked for lateral, vertical and rotational movement.
Lateral restraint keeps a product from sliding toward the mailer wall or striking a neighboring item. Side rails, folded tabs, partitions and close-fitting cavities can all provide it. Vertical restraint prevents a product from lifting out and hitting the lid; a shoulder collar, top pad or controlled lid clearance may be needed. Rotational restraint matters for bottles, jars and devices with one vulnerable face.
Do not use the outer mailer as the only stop unless that contact is intentional. If the complete insert can slide inside the box, a well-fitted cavity has solved only half the problem. Check insert-to-box clearance after the insert is erected and loaded, because folds and product pressure can change its outside dimensions.
Build tolerance into the contact points
Clearance is not simply empty space around the product. It should be assigned according to the likely variation and the purpose of each feature.
A retaining tab can flex to accept a diameter range. A hard die-cut opening may not. A folded rail can establish a datum on one side while leaving controlled clearance on the other. For multiple SKUs, removable partitions or alternate locking positions may be more reliable than one oversized cavity filled with loose material.
Test the smallest and largest expected product conditions. If only the nominal sample is used, the production line becomes the first tolerance study. Common warning signs are operators forcing products into place, trimming tabs, adding tape or leaving a feature unlocked because the intended sequence is too difficult.
Removal is part of the engineering
Customers should not have to pull on a pump, label or delicate finish to remove a product. Packers should not need to flex the insert so hard that its locks open.
Finger notches, lift tabs and exposed gripping zones need enough space for the intended user. The product should come out in the planned direction without dragging across a printed face. For sets, the opening sequence should not require removing an unrelated item first unless that sequence is intentional.
Run the removal check with people who did not design the pack. Designers already know where to pull and can overlook an ambiguous experience.
Choose material after the geometry works
Folded paperboard is useful for platforms, collars and presentation layers around relatively light products. Corrugated structures add depth and can transfer load through rails, pads and partitions. Molded pulp can produce repeated formed cavities for stable geometries. Foam can provide cushioning or precise retention where its material properties and end-of-life implications are acceptable.
The material name does not establish performance. Board stiffness, grain direction, flute orientation, pulp tolerance, foam density, coating and crease design all affect the finished insert. If two materials are being compared, keep the product, mailer dimensions and failure criteria constant.
Design the packing sequence with the insert
An insert that performs well after careful bench assembly may be unsuitable for production. During a short line trial, record:
- time to erect or place the insert;
- time to load each component;
- force and hand movements required;
- common orientation errors;
- product scuffing or label damage;
- missing-component visibility;
- whether the mailer closes without adjustment.
Asymmetric locks can prevent reversed assembly. A clearly visible empty cavity can make a missed component obvious before the lid closes. One fewer confusing fold may matter more than reducing a small amount of board.
Use samples for different decisions
A blank structural sample answers fit, assembly and removal questions. It does not approve print color or the production board. A printed sample can confirm panel orientation, rub risk and artwork around folds. A production-equivalent packed sample is required for distribution evaluation.
Keep those approvals separate. If a white sample board is substituted for speed, note that it does not approve the final stiffness or surface. If a 3D-printed dummy replaces the filled product, note the difference in weight and contact behavior.
Test the complete product-package system
Transit testing should use the finished product, insert, mailer, normal documentation and closure. The International Safe Transit Association lists different procedures for different distribution systems in its test-procedure overview; the appropriate program depends on the actual route and project risk.
Define failure before testing. Depending on the product, failure might mean breakage, leakage, an actuated pump, label scuffing, movement beyond an agreed limit, an unlocked insert or unacceptable damage to the customer-facing mailer. A package can protect the product and still fail the presentation requirement.
Retest or review the evidence when product dimensions, filled weight, insert construction, board, box size or packing method changes. A successful test belongs to the tested configuration, not to the general idea of “a box with an insert.”
Put the engineering fields into the RFQ
Comparable quotations require more than a reference photograph. Send controlled product data or samples, packed orientation, quantity, distribution route, required restraint functions, preferred material constraints, assembly state, test criteria and delivery details. Identify whether the insert and outer mailer should arrive separately or as one assembled component.
PackagingFor’s custom packaging RFQ checklist provides the broader commercial fields. For this structural review, ask each supplier to state assumptions about tolerances, tooling, samples and testing rather than hiding them inside a unit price.
Approve the cavity, contact and route together
PackagingFor develops custom packaging inserts and custom mailer boxes as coordinated components. The useful starting package is a production sample, tolerance range, filled weight, packing sequence and plain-language failure criteria. Those inputs turn an attractive insert concept into a design that can be packed, opened and tested consistently.